Sunday, April 26, 2015
assignments_April 27_May 15
Here are your assignments from April 27- May 15.
These assignments are very open ended, meaning that you have lots of creative freedom when you photograph.
1. Reflections. Take two photographs of reflections.
Due May 1.
2. My favorite things. Take a photograph of two different things, or people, or animals, etc. that are important to you.
Due May 8.
3. Action. Take two photographs that show action.
Due May 15.
Optional:
Multiple views of a simple object in black
and white. At least 4 views in 1 Photoshop document.
This assignment is to photograph a small, simple object ( a coffee mug for example)from 4 different angles or points of view. You should take the photos, convert them to black and white, and place them all in one Photoshop document.
What I want you to know:
1. How to create a photograph that illustrates concepts or ideas
2. How to save photos in the correct file format and in a specified location.
3. How to make a photo that demonstrates the rule of thirds in composition
Standard 1.0 Media, Techniques and Processes
Students will understand and apply media, techniques, and processes.
Course Level Expectations (CLEs)
The student will
1.1 Demonstrate the use of knowledge and technical skills in at least one specific medium.
1.2 Demonstrate an understanding of the safe and responsible use of art media and tools.
1.3 Create visual art that communicates ideas through the use of media, techniques, and processes.
1.4 Analyze, synthesize, and evaluate the application of media, techniques, and processes
used to solve visual art problems.
Standard 2.0 Structures and Functions Students will use knowledge of both structures and functions. Course Level Expectations (CLEs) The student will
2.1 Demonstrate an understanding of the elements of art and the principles of design.
2.2 Critique organizational components (structures) and expressive qualities (functions) of a
work of art.
2.3 Evaluate the function of a work of art as to utilitarian or intrinsic purposes.
2.4 Apply problem-solving skills to create solutions to a specific visual art task.
Standard 3.0 Evaluation
Students will choose and evaluate a range of subject matter, symbols, and ideas.
Course Level Expectations (CLEs) The student will
3.2 Evaluate subject matter that reflects personal experiences and environments.
3.4 Research and create a series of related work using a range of subject matter, symbols,
and/or ideas.
Standard 6.0 Interdisciplinary Connections Students will make connections between visual arts and other disciplines.
Course Level Expectations (CLEs) The student will
6.1 Examine the correlation of materials, technologies, processes, and terminology used in visual art with those used in other disciplines.
6.2 Integrate ideas, issues, and themes in the visual arts and other disciplines.
Saturday, April 11, 2015
final exam review
Photo
Fnal exam study sheet rev 4_19_15
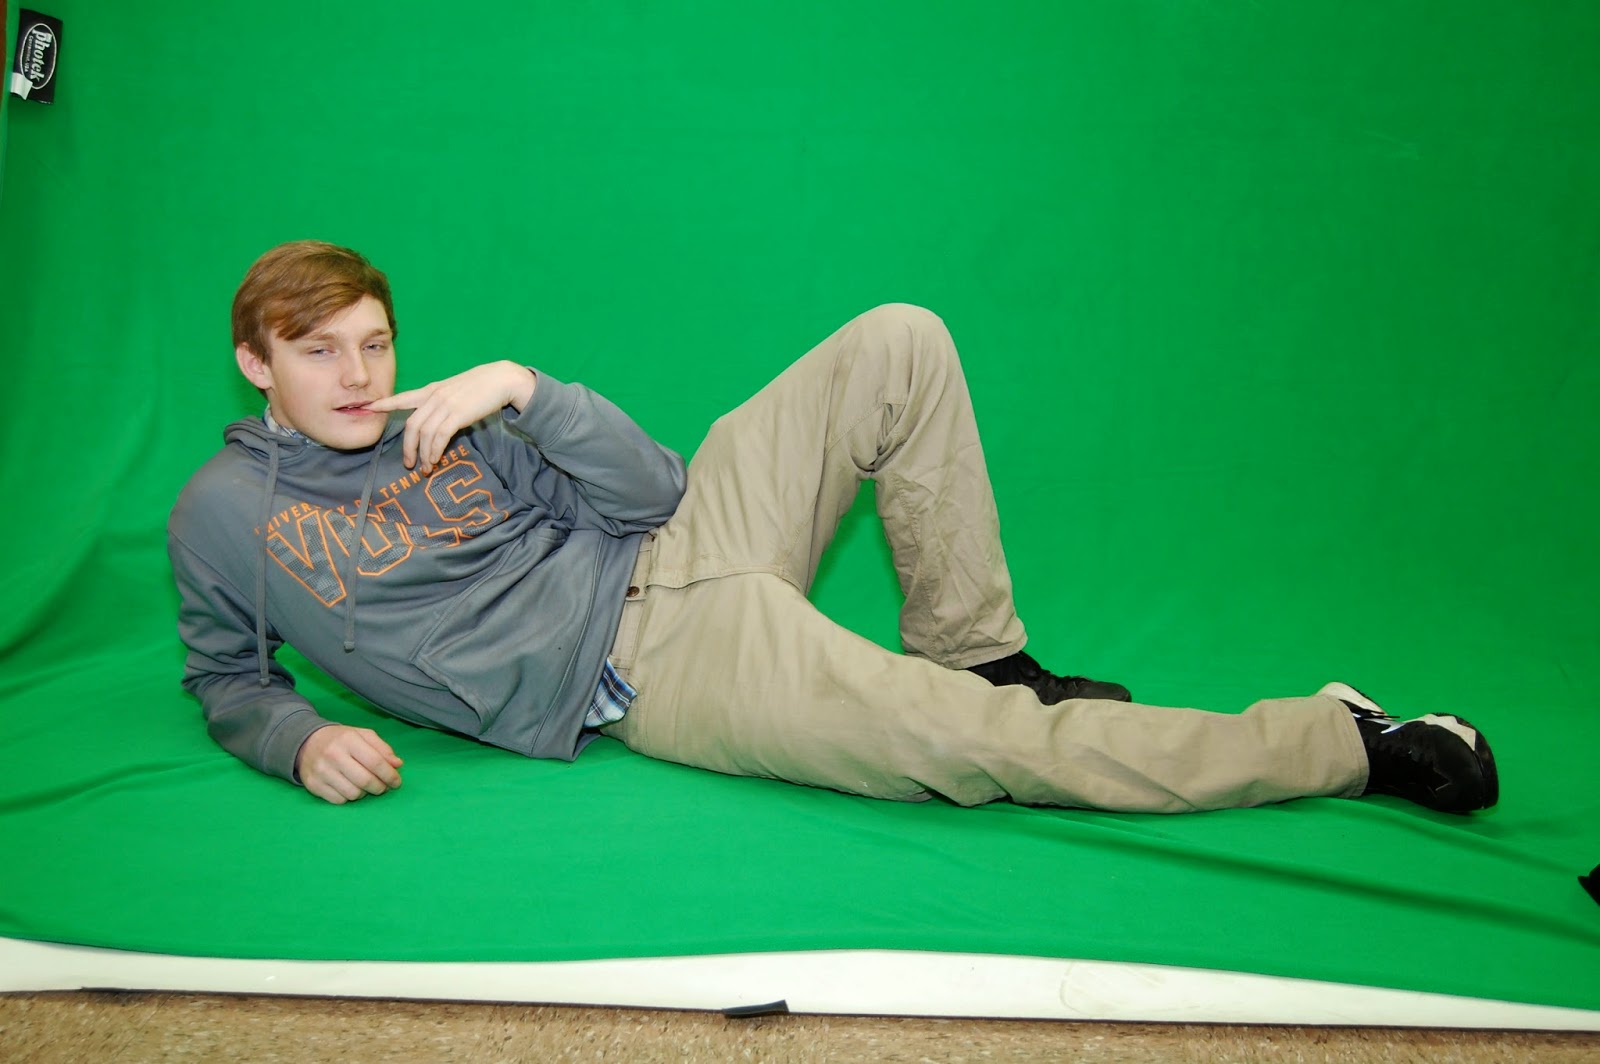
Green screen
Chroma key compositing, or chroma keying, is a special effects / post-production technique for compositing (layering) two images or video streams together based on color hues (chroma range). The technique has been used heavily in many fields to remove a background from the subject of a photo or video – particularly the newscasting, motion picture and video game industries. A color range in the top layer is made transparent, revealing another image behind. The chroma keying technique is commonly used in video production and post-production. This technique is also referred to as color keying, color-separation overlay (CSO; primarily by the BBC[2]), or by various terms for specific color-related variants such as green screen, and blue screen – chroma keying can be done with backgrounds of any color that are uniform and distinct, but green and blue backgrounds are more commonly used because they differ most distinctly in hue from most human skin colors. No part of the subject being filmed or photographed may duplicate a color used in the background.
Here are important guidelines to follow.
• Contrast the color of the background screen & subject
• Be careful of white, black, gray
• Avoid red, yellow, brown
• Use a saturated color if possible
Contrast the color of the background screen & subject
This is a very important rule! The color used for your backing screen should NOT be present in the subject. If your model is wearing a blue shirt and she is photographed against a blue backing screen, the shirt may visually disappear when the blue background is removed.
Be careful of white, black, gray
Some photographers try to solve the issue of color spill by using a neutral background of black, white or gray. While this cuts down on lights reflecting color onto your subject, it may cause other issues.
Black, white and gray baking screens are often problematic because those colors are found in almost every foreground object. Shadows are mostly composed of black. Highlights almost always contain white. A value of gray is often lurking in another color. This makes pulling a key extremely difficult, since Primatte doesn't know what color to focus on for extraction.
Avoid red, yellow, brown
Another color that you need to be careful of is red. A red screen can get too entangled with the red skin tones of human models. This is also true for yellow and brown since they are almost always found in skin tones. Blue and green are the best choices for photographing humans because these colors are least likely to be found in skin tones.
Use saturated color if possible
If possible, use a saturated color for your screen. For instance, a rich blue will always work better than light blue or turquoise. There are numerous screen products manufactured in the colors of 'Chromakey Blue' and 'Chromakey Green'.
Photoshop work………..
To create a new document in Photoshop, go to File>New
To move objects in Photoshop, you should use the Move Tool
Compositing is another word for layering several images in Photoshop.
The best way to open a JPEG in Photoshop is to drag it to the Photoshop icon.
The best Photoshop tool for erasing solid color backgrounds is the Magic Eraser Tool.
To add new layers into a Photoshop document, you can click, hold and drag or copy and paste.
Before you can make changes to a photographic layer in Photoshop the layer must be rasterized.
To rasterize a layer, go to Layer>Rasterize>Layer or All Layers
To resize an image, go to Edit>Free Transform
If you resize an image and you want to keep it that size, click on the check mark in the options bar. If you do not want to keep it, click the cancel button.
To scale an image using Edit>Free Transform and keep the exact proportions, press and hold the Shift key while dragging from a corner.
To add filters to an image, go to Filter and select the filter you want.
Use the Paint Bucket Tool to color an image.
http://stevecampbellhillwood.blogspot.com/2015/05/final-examphotoshop.html
Use the Paint Bucket Tool to color an image.
http://stevecampbellhillwood.blogspot.com/2015/05/final-examphotoshop.html
from 1st semester…………………
Photography is the science, art and practice of creating durable images by recording light or other electromagnetic radiation, either chemically by means of a light-sensitive material such as photographic film, or electronically by means of an image sensor.
The word photography comes from two ancient Greek words: photo, for "light," and graph, for "drawing." "Drawing with light" is a way of describing photography.
A photograph can be a portrait, selfie, street scene, still life, a historical document that is frozen time, a landscape, and much more.
Camera: An optical device for taking photographs, generally consisting of a lightproof enclosure having an opening or aperture with a shuttered lens through which the image of an object is focused and recorded on a photosensitive film, plate, or a sensor in digital photography.
A camera obscura (Latin: "dark chamber") is an optical device that led to photography and the camera. The device consists of a box or room with a hole in one side. Light from an external scene passes through the hole and strikes a surface inside, where it is reproduced, rotated 180 degrees (thus upside-down), but with color and perspective preserved. The image can be projected onto paper, and can then be traced to produce a highly accurate representation.
The Greek philosopher and scientist Aristotle (384-322 BCE); Mozi (470 to 390 BCE), a Chinese philosopher; and Euclid, born unknown (mid-4th century BC) died unknown (mid-3rd century BC), all contributed observations knowledge about this phenomenon.
|
Lenses and mirrors were added to the camera obscura during the Renaissance.
In the mid-1820's, a metal plate, coated with a light-sensitive emulsion was added to create the first photograph. These photos were called daguerreotypes.
|
The Vocabulary of Art & Photography
art elements & principles of design:
Art Elements
Line: A line is a path left by a moving point. A continuous mark on a surface.
What are the functions of line?
1. to outline a shape
2. to create movement and emphasis
3. to develop pattern and texture
4. to shade and model using hatching, crosshatching and stippling.
Shape is a two dimensional area with identifiable boundaries.
What are the two broad categories of shape?
1. Geometric shapes - mechanically drawn lines, squares, rectangles, circles. We see them in architecture and manufactured items.
2. Organic shapes - are shapes based on forms of nature, which are usually rounded, irregular and curving. Leaf, seashells, flowers. We see them in nature and with characteristics that are free flowing, informal and irregular.
Value - is the lightness or darkness of a color or photo
• High-Key is where the picture is all light values.
• Low-Key is where the picture is all dark values.
• Value Contrast is where light values are placed next to dark values to create contrast or strong differences.
• Value Scale is a scale that shows the gradual change in value from its lightest value, white to its darkest value black.
Texture refers to surface quality.
• Real Texture is the actual texture of an object. Artist may create real texture in art to give it visual interest or evoke a feeling. A piece of pottery may have a rough texture so that it will look like it came from nature or a smooth texture to make it look like it is machine made.
• Implied Texture is the where a two-dimensional piece of art is made to look like a certain texture but in fact is just a smooth piece of paper. Like a drawing of a tree trunk may look rough but in fact it is just a smooth piece of paper.
The two types of space are three dimensional and two dimensional.
1. three dimensional space - is the actual space an object takes up, our body, a house, a can or a sculpture. An example is the Frank Lloyd Wright, Guggenheim Museum.
2. two dimensional space - refers to the space in a painting, drawing, print or other type of flat art.
Positive Space-In a drawing or painting positive shapes are the solid forms
in a design such as a bowl of fruit. In a sculpture it is the solid form of the
sculpture.
Negative Space-In a drawing it is the space around the positive shape or
the shape around the bowl of fruit. In sculpture it is the empty shape
around and between the sculptures.
Principles of Design
Emphasis:
a principle of design by which the artist or designer may use opposing sizes or shapes, contrasting colors, or other means to place greater attention on certain areas or objects in a work of art. Emphasis is achieved by dominance and subordination, bright against dull, light on dark, large among small, etc.
What are 3 ways you could create emphasis in a photograph?
Balance: a principle of design that refers to the equalization of elements in a work of art. There are three types of balance
Asymmetrical-balance in which one side of the composition appears different from the other side while remaining balanced with it.
Symmetrical- balance in which both sides are identical.
Radial-balance based on a circle, with features radiating from a central point.
Contrast: a principle of design that refers to differences in values, colors, textures, and other elements in artwork to achieve emphasis and interest.
Movement: a principle of design that refers to the arrangement of parts in artwork to create a flow of the viewer’s eye through the repeated arrangement of line, shape, color, texture or value; through the orderly positioning of objects; through contrasting positive and negative shapes; through contrasting sizes; or through gradation of colors and values.
Pattern: a principle of design in which combinations of lines, colors, and shapes are repeated. These repetitions create rhythm in a work of art. Motif is a unit that is repeated in visual rhythm (suggest movement through repetition). Units in a motif may or may not be an exact duplicate of the first unit.
Sunday, April 5, 2015
chroma key or "green screen" photography

Chroma key compositing, or chroma keying, is a special effects / post-production technique for compositing (layering) two images or video streams together based on color hues (chroma range). The technique has been used heavily in many fields to remove a background from the subject of a photo or video – particularly the newscasting, motion picture and videogame industries. A color range in the top layer is made transparent, revealing another image behind. The chroma keying technique is commonly used in video production and post-production. This technique is also referred to as color keying, colour-separation overlay (CSO; primarily by the BBC[2]), or by various terms for specific color-related variants such as green screen, and blue screen – chroma keying can be done with backgrounds of any color that are uniform and distinct, but green and blue backgrounds are more commonly used because they differ most distinctly in hue from most human skin colors. No part of the subject being filmed or photographed may duplicate a color used in the background.
Here are important guidelines to follow.
• Contrast the color of the background screen & subject
• Be careful of white, black, gray
• Avoid red, yellow, brown
• Use a saturated color if possible
Contrast the color of the background screen & subject
This is a very important rule! The color used for your backing screen should NOT be present in the subject. If your model is wearing a blue shirt and she is photographed against a blue backing screen, the shirt may visually disappear when the blue background is removed.
Be careful of white, black, gray
Some photographers try to solve the issue of color spill by using a neutral background of black, white or gray. While this cuts down on lights reflecting color onto your subject, it may cause other issues.
Black, white and gray baking screens are often problematic because those colors are found in almost every foreground object. Shadows are mostly composed of black. Highlights almost always contain white. A value of gray is often lurking in another color. This makes pulling a key extremely difficult, since Primatte doesn't know what color to focus on for extraction.
Avoid red, yellow, brown
Another color that you need to be careful of is red. A red screen can get too entangled with the red skin tones of human models. This is also true for yellow and brown since they are almost always found in skin tones. Blue and green are the best choices for photographing humans because these colors are least likely to be found in skin tones.
Use saturated color if possible
If possible, use a saturated color for your screen. For instance, a rich blue will always work better than light blue or turquoise. There are numerous screen products manufactured in the colors of 'Chromakey Blue' and 'Chromakey Green'.
Tuesday, March 17, 2015


Saturday, February 14, 2015
deconstruct a photo


What I Want You to Know:
How to use specific Photoshop tools to edit digital photos
How to use layers for digital imaging techniques
How to combine different parts of several photos into one new photo
Standards
3.Students will integrate reading, writing, math, and science skills and understand the impact of academic achievement in the workplace.
4.Students will relate and apply artistic knowledge, skills, techniques, processes and strategies for the creation of design, photographic, web, print, and various digital projects.
6.Students will produce creative and artistically pleasing media for use in various applications for advertising, internet, film, entertainment, and marketing communications.
10.Students will develop e-Skills that are flexible and evolve with the increasing demands of technology developments and business needs, helping students become life-long learners.
11.Students will demonstrate skills that are employable and desirable to a rapidly changing industry that demands innovation.
Help with Photoshop
copying photos onto layers
working with the layers palette
directions
Drag the eye onto your desktop
open photoshop
go to window>workspace>essentials or design (for CS5)
go to file>new>name: type your name_photoshop_deconstruct eye
width: 18 inches (not pixels)
height: 16 inches
resolution:100
color mode: rgb
background contents: white
click OK
be sure you check Auto-Select Layer

Use the polygonal lasso tool to select an area of the eye photo

Go to Edit>Cut
Go to the new document and Edit>Paste
Move the section you have pasted to where you want it
Repeat, using at least 12 sections cut and pasted from the original photo.
Go to Edit>Cut
Go to the new document and Edit>Paste
Move the section you have pasted to where you want it
Repeat, using at least 12 sections cut and pasted from the original photo.
Your grade will be based on:
1. Correct document size and specifications (50 points)
2. Photos on all layers (25 points)
3. Photos resized to fit layout (25 points)
Sunday, January 25, 2015
digital imaging & editing
Assignment description:
This will be an ongoing look at the Photoshop skills and techniques related to digital imaging and manipulation of photographs. We will learn Photoshop tools and processes for editing digital photos. This will mostly involve learning how to take selections from several photos and combine them into one photo using layers and layer modes.
Show Photoshop help link:
copy and paste photos
What I Want You to Know:
How to use specific Photoshop tools to edit digital photos
How to use layers for digital imaging techniques
How to combine different parts of several photos into one new photo
Today:
http://hillwoodphoto2.blogspot.com/2015/01/photo-2photoshop-collage.html
Standards:
Standard 1.0 Media, Techniques and Processes
Students will understand and apply media, techniques, and processes.
Course Level Expectations (CLEs)
The student will
1.1 Demonstrate the use of knowledge and technical skills in at least one specific medium.
1.2 Demonstrate an understanding of the safe and responsible use of art media and tools.
1.3 Create visual art that communicates ideas through the use of media, techniques, and processes.
1.4 Analyze, synthesize, and evaluate the application of media, techniques, and processes
used to solve visual art problems.
Standard 2.0 Structures and Functions Students will use knowledge of both structures and functions. Course Level Expectations (CLEs) The student will
2.1 Demonstrate an understanding of the elements of art and the principles of design.
2.2 Critique organizational components (structures) and expressive qualities (functions) of a
work of art.
2.3 Evaluate the function of a work of art as to utilitarian or intrinsic purposes.
2.4 Apply problem-solving skills to create solutions to a specific visual art task.
This will be an ongoing look at the Photoshop skills and techniques related to digital imaging and manipulation of photographs. We will learn Photoshop tools and processes for editing digital photos. This will mostly involve learning how to take selections from several photos and combine them into one photo using layers and layer modes.
Show Photoshop help link:
photoshop tools
copy and paste photos
also shows cutting out a background
video on selections
selection tools gallery
the lasso tool
copy and paste photos
What I Want You to Know:
How to use specific Photoshop tools to edit digital photos
How to use layers for digital imaging techniques
How to combine different parts of several photos into one new photo
Today:
http://hillwoodphoto2.blogspot.com/2015/01/photo-2photoshop-collage.html
Standards:
Standard 1.0 Media, Techniques and Processes
Students will understand and apply media, techniques, and processes.
Course Level Expectations (CLEs)
The student will
1.1 Demonstrate the use of knowledge and technical skills in at least one specific medium.
1.2 Demonstrate an understanding of the safe and responsible use of art media and tools.
1.3 Create visual art that communicates ideas through the use of media, techniques, and processes.
1.4 Analyze, synthesize, and evaluate the application of media, techniques, and processes
used to solve visual art problems.
Standard 2.0 Structures and Functions Students will use knowledge of both structures and functions. Course Level Expectations (CLEs) The student will
2.1 Demonstrate an understanding of the elements of art and the principles of design.
2.2 Critique organizational components (structures) and expressive qualities (functions) of a
work of art.
2.3 Evaluate the function of a work of art as to utilitarian or intrinsic purposes.
2.4 Apply problem-solving skills to create solutions to a specific visual art task.
photo_photoshop collage
SSA
• It's going to be cold and it's going to be hot
• Dress with that in mind
• I will report non-SSA
What I Want You to Know:
Feb 6:
done:
open photoshop

• It's going to be cold and it's going to be hot
• Dress with that in mind
• I will report non-SSA
What I Want You to Know:
How to use specific Photoshop tools to edit digital photos
How to use layers for digital imaging techniques
How to combine different parts of several photos into one new photo
Standards
3.Students will integrate reading, writing, math, and science skills and understand the impact of academic achievement in the workplace.
4.Students will relate and apply artistic knowledge, skills, techniques, processes and strategies for the creation of design, photographic, web, print, and various digital projects.
6.Students will produce creative and artistically pleasing media for use in various applications for advertising, internet, film, entertainment, and marketing communications.
10.Students will develop e-Skills that are flexible and evolve with the increasing demands of technology developments and business needs, helping students become life-long learners.
11.Students will demonstrate skills that are employable and desirable to a rapidly changing industry that demands innovation.
Help with Photoshop
copying photos onto layers
working with the layers palette
directions
Feb 6:
open photoshop
go to window>workspace>essentials or design (for CS5)
go to file>new>name: type your name_photoshop collage 1
width: 17 inches (not pixels)
height: 22 inches
resolution:300
color mode: rgb
background contents: white
click OK
done:
open photoshop
go to window>workspace>essentials or design (for CS5)
go to file>new>name: type your name_photoshop collage 1
width: 20 inches (not pixels)
height: 4 inches
resolution:300
color mode: rgb
background contents: white
click OK
be sure you check Auto-Select Layer
1. Find high resolution images
or....not copyright free
2. Get the jpeg images onto your desktop. Sometimes you will download the images. Sometimes you will click, hold and drag the image onto your desktop. Sometimes you must click twice or 3 times to get a high res image. or on one of the images and drag it to the desktop. Remember: At caedes.net, click on a photo, select one of the high resolution images and drag it to the desktop.
3. Drag it onto the Photoshop icon in the dock to open it.
4. Copy it into the new Photoshop document>Click and hold on the layer thumbnail>Drag it into the new Photoshop document.
Note: In CS5, your image layer thumbnails may have an X over them. If they do, click on the check mark in the Options Bar, then go to Layer>Rasterize>Smart Object
5. Resize: Go to Edit>Free Transform and resize the image to fit in the document. Hold down Shift to resize in proportion. Click the check mark when you have what you want or the cancel button if it’s not what you want.
6. Go to File>Save. Be sure you are saving into your folder.
Repeat
1. Repeat steps 1-6 above and create new layers with a new photograph on each layer.
2. Resize all of the images to make them fit in the new document. It is good to have layers overlapping
3. Save the document and tell me when you are finished.
Remember that you can turn off the eyeballs on Photoshop layers to simplify what you are doing to each layer.
Your grade will be based on:
1. Correct document size and specifications (50 points)
2. Photos on all layers (25 points)
3. Photos resized to fit layout (25 points)
Friday, January 2, 2015
tools & processes
photoshop tools
http://helpx.adobe.com/photoshop/using/tools.html
copy and paste photos
youtube video
the easy way
http://stevecampbellhillwoodsamples.blogspot.com/2010/12/copy-images-into-photoshop.html
video on selections
http://helpx.adobe.com/photoshop/using/tools.html
copy and paste photos
youtube video
also shows cutting out a background
the easy way
http://stevecampbellhillwoodsamples.blogspot.com/2010/12/copy-images-into-photoshop.html
video on selections
selection tools gallery
the lasso tool
converting a photo to an outline drawing
Subscribe to:
Posts (Atom)